Wednesday, May 4, 2011

Put a Bacon On It

It's all soooooo tiring isn't it? Bacon-this, and Bacon-that...People brushing their teeth with strips of bacon, laying uncooked slabs of maple cured pork on their loved ones chests to cure their cold, junkies cutting their cocaine with bacon salt.
I know...I know. It's over done.

But I claim victory in this current baking episode...the case of the Bacon-Bourbon-Sweet Tater Pie. I'm not from the south...though I do care deeply for Bourbon, large hats, lilty accents, Gone With the Wind, and sexy Cajun fiddlers. What better show of support for all [good] things southern than at a party I was recently invited to. Teresa Tidwell Busch's Southern Fried Thowdown, which featured 5 chefs from various southern states cooking their signature dishes they grew up enjoying. The guests (me included) were asked to bring a side dish. I thought this would be a great opportunity to debut a new creation I thought of, BACON PIE CRUST. The rest of the pie was easy, pouring a shot of bourbon into the mashed potato-cream-butter-and spice-sugar mixture in my kitchen aid bowl and dump said goop into the bacon pie crust. Increase amount of liquid slightly as the bacon will absorb it. It's as easy as all that! Seriously!


My tiny RV kitchen

I'll give a brief overview on how I made the pie...and seriously, baking while drunk is really fun...but make sure you kind of have whatever recipe "down" beforehand. I know my pie would have come out better if I wouldn't have taken so many pulls out of the bourbon bottle, but whatever.

1 lb. sweet potatoes
2 eggs
1 1⁄2 cups milk
4 tbsp. butter, melted and cooled
1 cup brown sugar
1⁄2 tsp. ground cloves
1 1⁄2 tsp. ground cinnamon
1⁄2 tsp. nutmeg
1⁄4 tsp. salt
1  9" Unbaked pie shell

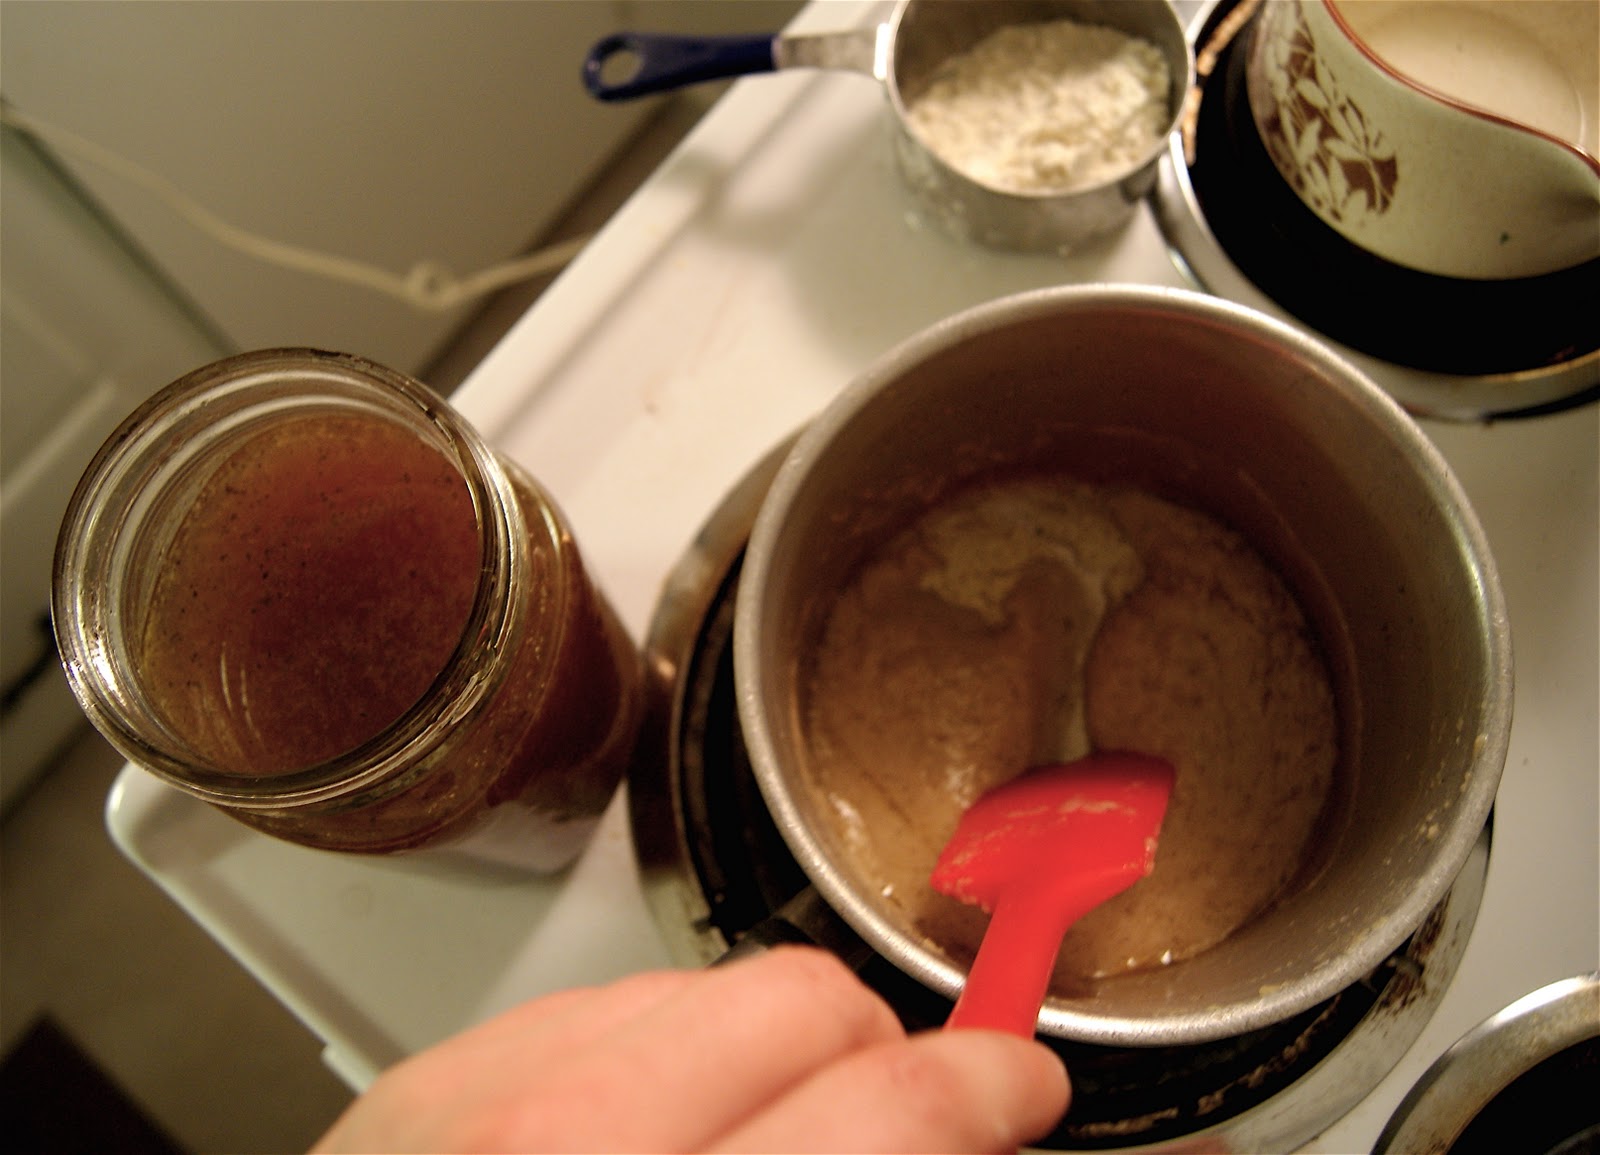
1. Preheat oven to 450°. Peel sweet potatoes, cut into large pieces, and cook in boiling salted water over high heat until tender, about 20 minutes. Drain, mash, and measure.
2. Whisk/Mix/Whatever eggs, milk, butter, brown sugar, cloves, cinnamon, nutmeg, BOURBON and salt in a large bowl. Add sweet potatoes; beat until smooth. Pour into an unbaked 9" pie shell. Bake 15 minutes; lower oven to 350° and bake an additional 20–25 minutes until set. Cool completely before cuttin'...


Made with Love, and Lard

For the crust use your favorite crust recipe. If you don't have one go to  mirror, look into it for a very long time. Ask the image looking back at WHY IN GOD'S NAME THEY DON'T HAVE A PREFERRED PIE CUST RECIPE and then go to a fucking computer, or cookbook (if you can read) and FIGURE IT OUT. If you're an emergency room surgeon, you have twin babies hanging off your nipples, or you have given up on life, there's always the store bought shit.
Cook the fucking bacon, I added some maple syrup and brown sugar to add some carmel flavor and to make the bacon a bit more cripsy. Chop the fucking bacon. Sprinkle said fucking bacon into the crust. Roll it out, droop over pie pan. Pour sweet tater goop into shell. Do something cute for the top, or whatever.
Put in pie hole...don't forget to chew, dummy!

Later at the party...everyone was too damn full on the delicious spread of ham hocks, fried chicken, gumbo, chicken fried bacon, pork belly sammiches, deep fried shrimps wrapped in bacon, deep fried catfish, and layer cake, that by the time I slapped my little pie on the table everyone was ready to kick me in the face for adding insult to fattiness. Lesson learned.

Fun party though! Thanks Teresa!

Wednesday, February 2, 2011

POUTINE!

  Call ‘em what you will: in jolly old England they’re called chips, in ‘Merica we say fries, and the French say pommes frites. But really, who fucking cares? Just smother these elongated strips of crispy deep fat-fried taters in gravy and cheese and you got yourself some of the best snack ever created by the human hand.  
  Poutine, pronounced POO-TAN, otherwise known as "fries and gravy", was created in Quebec around the mid 20th century and the origin of the name still strikes true in daring kitchens around the world today. Fernand Lachance, fatty goopy snack pile lover and native Quebequois, once exclaimed, “ça va faire une maudite poutine! ("it will make a damn mess!"), which is where the greasy pile is rumored to have gotten its name. Lachance wasn’t joking…I would really do some kitchen prep in order to cut down on hours of scrubbing and the inevitable grease fire. Think of how Dexter Morgan would prepare, if he were making home fries’n’gravy.
  STEP 1) The dark beef gravy, which is the sexier, more flavorful cousin of the pale sausage-clump country variety, we created by boiling beef bones for 5 hours with some veggie trash and spices the morning of.  Nothing like a good stock to really make you feel like less of a failure as a woman.  You can also use canned broth (beef, chicken, veg)…but it wont be nearly as badass…just sayin’.  It might actually just be a huge embarrassing failure.  But it's entirely respectful if you want to take that chance.  Whatever.

  Okay!...This is how we make gravy...no measuring!  Eek!  Most would frown on such a method, but they are stuck up and are of no use to us.  First, make kind of a roux: pour a couple tablespoons of oil (we like olive for this application) into a little saucepan along with a few pats of butter.  Let that melt thoroughly over medium heat, and then whisk in a few tablespoons of all-purpose flour.  No chunks!  Yeah, sorry, white flour is really good for lots of things.  But you can always go organic, even though it’s just gonna make you fat in the long run!  
  Now turn the heat down a bit and let it simmer real delicate-like for a few minutes, it’ll thicken a scosh.  Next, whisk in 2 or 3 cups of stock.  Let that  simmer for 5 or 10 minutes, stirring occasionally, and keep that heat to a minimum.  Slower is better for the gravy-train.  Add more stock if necessary to stretch to your liking, or a bit more flour if it seems too thin (but make sure to mix flour with a tiny bit of COLD stock or water and then add it to your pot, otherwise: CLUMPS!)  Just trust yourself, dipshit.  Don’t be afraid of a little cookin’.  Use your best judgement!  You can always try again! 
  When you’ve reached a desired consistency, which may take some time, turn your heat to low to keep it warm until you need it.  At this point you can tweak it with some salt and pepper, herbs, garlic, ruffies, benzos, whatever gets yer goat!
  STEP 2) Accoutrements.
Being hell bent on decorating our messy fry pile, we decided to hack up some delicious herbs and garlic to toss on the hot salty chippies. And since we couldn’t get fresh gooey cheese curds from our local dairy farm (!%^&!) we opted for a mild yet barn-yardy goat cheddar imported from England. Chop or crumble the cheese into bite-sized bits and set aside.
  Mince some parsley (flat or curly, don't matter), garlic, and green onion together and put in a bowl. It got stinky…make sure you warn your make out buddy ahead of time, or make sure they’re eating it too.
  STEP 3) Frites Magique.
soaking

followed by frying
Yukon Gold taters are pretty amazing, and that’s not some biased southeast Alaska shit either, but any medium to large type of potato will do nicely.  Opting for a nice size in between steak fries and the thin Mickey Dee’s variety, we cut them into sturdy, moderately-sized strips. Soak these guys in water for about 40 minutes at the least, changing out for fresh cold water at the halfway mark. 
  Near the end of your soak, grab a large saucepan, stockpot, or dutch oven fitted with an accurate frying thermometer and fill it about one third full with vegetable/peanut oil or the like, any kind with a good high smoke point.  Grapeseed is nice too!  On medium-high, get that oil up to about 350 F.  In modest batches, fry all your taters for about 3 or 4 minutes, and place them to drain on some paper bags or towels.  When every last pomme frite has been frite-d, crank up the heat a tinch ‘til you get to about 380 F.  Fry those niblets a SECOND time, for another few minutes, until they’re niiiiiiiice and dark golden brown.  
  Drain once again and sprinkle hot fries with salt (preferably the kosher or sea type, anything with more flavor and texture than stupid "table salt").


QueLinda Blanco's like
"hey small greasy friends"
  STEP 4) Alright fatty, it’s the moment you’ve been waiting for.
Pile, Goop, Sprinkle, Clot. 
  Hey!  Our special guests QueLinda Blanco and real live Canadian Pepe like our Poutine! 
"I'm from Canada"
  To toot our own flubby horns, it WAS quite the epic snackstravaganza. 
With a name like Pepe, the ladies don't give a shit where you're from.
  Not pictured: grease fire. Always make sure your fire extinguisher is armed and ready! 

Tuesday, January 18, 2011

Croissant Avec Beurre!

nutella, spinach/mozz/romano, eek!
Well, rumor has it the original croissant was forged in Budapest, somewhere near the end of the 17th century, following a siege attempt and local bakers celebrating their intact city by fashioning a roll to reflect the crescent on the Ottoman flag or something.  Nobody cares anymore.  But this shit is delicious.  This is Papa Ritter’s recipe.  And we heart him.
INGREDIENTS
4 cups all-purpose flour
1/4 cup sugar
1 1/2 tsp salt
1 cup milk
1 cup warm water
3/4 oz active dry yeast (proofed for a few minutes in a bit of the warm water)
1/2 lb (2 sticks) butter, at room temp
-have ready 1 egg plus 1 tbsp water, beaten 
TOOLS
rolling pin (wash the blood off first)
countertop electric mixer (or not, hands work too if you’re not a pussy)
clean countertop
a couple baking sheets
parchment paper
pastry brush or brand new medium-sized paintbrush
METHOD
rest.
Combine all the ingredients (except butter and egg) in the bowl of your electric mixer fitted with a dough hook, or in a medium bowl and combine by hand, old-timey like, until everything sticks together in a good chunk.  Mix with dough hook or knead by hand for about 6 minutes, until your dough wad is smooth and elastic, like your thighs but smoother.  
Spread loosely on a floured baking sheet, cover with plastic wrap or a couple towels and let it rest for at least 3 hrs in the fridge (other cold places: basement, arctic entry), or as long as overnight.  

Now, when you’re ready to commit to playtime, roll out the dough on a floured surface in a long rectangle, approximately 18”x 10”-ish.

dot.
roll.
Dot your dough with thin pats of 1/3 of the butter, fold in thirds, and set aside and cover to rest for about 1/2 hour.  Repeat this two more times, rolling it out first and resting after each butter addition.

Now to shape your little snacks.  Roll out the dough on your floured countertop to about 1/4” thickness.  Croissant dough can be used and shaped liberally, much like puff pastry, in a variety of applications.  It can be cut and molded and stretched and pinched, and will usually give you just a puffier version of what you had in mind.  So you are free to experiment!  Turnovers with goop inside are always a hit.  We put Nutella in some and a savory spinach and cheese concoction (respectively) in some others.  What great ideas!  
But if you want a classic little croissant, cut triangles of dough by first cutting squares (maybe about 6” x 6”, but smaller is always cuuuuuute) and then halving those diagonally.  Roll from one of the sides up to it’s opposite point and plop it on your parchment-lined sheet pan.  Gently curl the ends inward to create a crescent shape.  
Ta daaaaaaaaaa!  Repeat as necessary, dummy.

shape.

Preheat your oven to 425; meanwhile let your pans of goodies rise for 30-45 minutes in a warm place.  Brush tops lightly with egg/water mixture and cram those suckers in  the hotbox for about 10-12 minutes, but keep an eye on them!  Look for rich, deep golden brown tops.  There!  You’re fancy!  Nice job, dickhead.


TASTING NOTES

mmmmmbuulbbhbhhbllluuuurrrghgghluuurghgg. The love handles are worth it.  Bllluuuugghrghyeahtotally.

cram.


Saturday, January 8, 2011

Fresh Bing Cherry Pie. Oh, my.

Does anyone out there really NOT love pie?  Assholes who are too chicken-shit to indulge a little, I guess.  Agent Dale Cooper loves pie, and he’s the dreamiest.  We also share his love of coffee.  But on this particular evening, we paired our pie with a lamb roast and fresh ravioli, among other snacks.  Hello!  Now, we’re big fans of “alternative” ingredients and the like, but with things like cherry pie, good old white flour really does the trick.
INGREDIENTS
The Cherry Chomper 
Crust:
1 3/4 cups all-purpose flour
3/4 cup butter (that’s 1 1/2 sticks), at room temp
a pinch or two of salt, if your butter wasn’t salted
cold water 
Filling:
about 5 cups Bing cherries (2-2 1/2 lbs), pitted and halved
3/4 cup sugar
3 1/2 tbsp cornstarch
2 tbsp water
juice and zest from 1 lemon

the elusive Mike B, chomping cherries

METHOD
Preheat your oven to 400.
Mix all the filling junk together in a bowl and combine thoroughly.  Set aside.  If you’d like to substitute tart cherries, increase the sugar by another 1/2 cup.  Normally I turn to flour for thickening things, mainly because it’s less processed and I like that idea, but Mike B insisted on cornstarch.  What a bossy little bitch.
Next, the crust.  It seems that I’m a renegade when it comes to pie crust.  I don’t use cold butter, I don’t measure the water I throw in, and I don’t let it rest and chill before rolling.  This way it’s quick and easy, even more so than I was in the summer of 2004.  But that’s a different blog post altogether.  But I swear it’s flaky and tender EVERY TIME!!!  “Flaky” and “tender” are what everyone wants in a pie crust, no?
Dump the flour into a medium bowl, and the salt if your butter is unsalted.  Dice up your butter and throw it in there, too.  Now wash those paws of yours and crumble the butter into the flour with said paws.  Do not use a pastry blender, do not use a food processor.  Not if you want to be a renegade.  Squish and crumble until you have a generally mealy texture with a good helping of pea or bean-sized chunks as well.  These little butter wads equal flaky crust once baked.
Now get some cold water in a cup.  Start out by dumping about 1/3 cup into your butter/flour mix.  Squish it around a little, and add more as necessary, a tablespoon at a time, until the dough just holds together.  Make sure to do this step quickly, within a minute or so, with as little mixing as possible.  Wet dough doesn’t like to be fussed with too much.  
Cut your dough ball in half, one slightly larger than the other.  Roll out the larger half on a floured surface and lay it gently in a 9-inch pie plate.  No need to grease it.  Remember all that butter in the dough?  Yeah.
Plop the filling in there.  Roll out the other half of your dough.  If you want to make a solid top crust, remember to poke some vent holes in it with a tiny knife or something, maybe in a fancy pattern or a picture of something you like.  This time, we chose to go with a lattice top.  Seems complicated.  It’s not.  Figure it out, dummy.  
Seal your top and bottom crusts with a fork or your fingers.  
Bake at 400 on a middle rack for 10-15 minutes, then turn the oven down to 350 and bake for an additional 40-50 minutes, rotating 1/4 turn every once in a while.  You may want to put a sheet pan under it to catch the escaping cherry goo before it burns to the bottom of your oven FOREVER.  You’re looking for a nice deep golden crust and bubbling goop from inside trying to crawl out of the pan.  
Let it cool at room temp for at least 1-2 hours, if not more.  Hot pie is delicious, I know, but it’s also runny.  If your fat face can manage to hold off for a bit, it’ll be pleasantly rewarded with heavenly sweet-tart fruit snot enveloped by that “tender, flaky crust”.  Agent Cooper would be more than happy to bury his face in your pie.  Yes, please!
TEAM VELMA LOVES PIE.
  

Thursday, January 6, 2011

Ma Chisholm's Apple Nut Cake

I love my Mom. She's basically one of the coolest, funniest, and most surprising people I know. This holiday I made it down to see the whole Chisholm crew, and I managed to sneak in some boozey cooking and baking with the lady who taught me everything I know.
Within the first 3 hours of walking through my parents' front door, I found myself  sweatpants clad, wearing a Santa hat, and holding a bloody mary. My mom popped up from around the corner clutching her favorite cookbook, and flipped to the dirtiest, gunkiest page with an excited grin.
Soups and Samplers a 1962 tome which to the naked eye looks like any 10 cent garage sale cookbook. Really it's a turdy looking gem--chock full of rock-solid no-fail recipes.
The apple nut cake in question sounds like nothing special, but this version yields extremely moist and flavorful chunks that melt in your mouth and warm the cockles of your bitter frost-bitten heart!
...and let's face it, who hates the smell of appley spicy goodness filling your house!? On Christmas fer crying out loud!?


METHOD
First you need some fuckin' apples. Personally, I prefer the tart variety,  as does my family. The damn granny smiths needed skinnin', and since peeling apples by hand is for losers, my Ma pulled out our handy-dandy apple peeling machine. It takes about 7 seconds per apple and it's a pretty good investment (BONUS! you can use them for any fruit of veg that needs to be skinned). 
Once bald, hack up the apples, roughly chop up the delightfully greasy walnuts, and combine both in a large mixing bowl. I added a generous drizzle of lemon juice, threw in the sugar, oil, and water to keep the apple chunks from drying out or getting oxidized.
It's so easy to make this cake as I was pretty buzzed, and I still managed to not mess it up!
You finish up by dumping the rest of the sifted dry ingredients into the mixing bowl, give her a good stir, and pour into your desired (greased) cake pans.
My cute Mommy dearest has always made two separate cakes, on in a glass 8x10 pan, and one in a pie pan (Pyrex also). The depth really lends well to get both cakes thoroughly cooked and caramelized on top and bottom.
Bake it up for about 40-45 minutes on 375 and voila...you're feeding 3 drunk 20-somethings and they're friends and putting a shit-eating grin on everyone's face. 
THANKS MOM! (i luv you!)

RECIPE
3-4 Apples (whatever you prefer. Grannies bake better and lend some acid to the sweetness of the batter)
1 1/2 cups of walnuts (the recipe calls for any tree variety, but we liked walnuts because they are awesome)
1 egg
1 cup sugar
1 cup flour
1/4 cup oil
1 tsp baking soda
1/4 tsp salt
nutmeg and cinnamon to taste (nutmeg is hated by our family so we omit it, and it's ok!)

these assholes totally love the apple nut cake!

Recipe provided by "Soups and Samplers" by Suzanna Wheppler and Adele G. Jones 1962

Tuesday, December 21, 2010

Holiday Time Cocomallows!


Time for a history lesson, kids!
  It seems that a lot of folks don’t know that marshmallow is a plant.  Apparently, the use of marshmallow to make a candy dates back to ancient Egypt, where the recipe called for extracting sap from the plant and mixing it with nuts and honey. Another pre-modern recipe uses the pith of the marshmallow plant, rather than the sap. The stem was peeled back to reveal the soft and spongy pith, which was boiled in sugar syrup and dried to produce a soft, chewy confection.
  Candymakers in early 19th century France may have made the innovation of whipping up the marshmallow sap and sweetening it, to make a confection similar to modern “marshmallows”. They would extract the sap from the mallow plant's root, and whip it themselves. The candy was very popular but its manufacture was labor-intensive. In the late 19th century, French manufacturers devised a way to get around this by using egg whites or gelatin, combined with corn starch, to create the chewy base.  So, I guess even those fancy Frenchies have been known to bastardize a thing or two.  It ain’t just us ‘mericans.
Well, this recipe is adapted from Smitten Kitchen:
INGREDIENTS
about 1 cup powdered sugar
3 1/2 envelopes unflavored gelatin (a disgusting and useful product)
1-2 tablespoons coconut flavor (also pretty gross)
about 1 cup shredded coconut, toasted nice and golden
1 cup cold water
2 cups granulated sugar (cane sugar works fine too)
1/2 cup brown rice syrup (available at your local natural foods store)
1/4 teaspoon salt
2 large egg whites
METHOD
Oil the bottom and sides of a 9x13 metal or glass baking pan and dust it with about 1/3 of the coconut, followed by a bit of the powdered sugar.
In the bowl of a fancy standing electric mixer, or in another large bowl, dump half of your cold water and sprinkle all of the gelatin over it.  Leave it be.
In a heavy saucepan (3-quart or larger) cook the granulated sugar, rice syrup, other half of the water, and salt over medium-low heat, stirring with a wooden spoon, until sugar is dissolved.  Now increase the heat just a bit and boil the mixture, WITHOUT STIRRING, until a candy or digital thermometer hits the 240F mark.  It’s gonna take about 12 or 15 minutes.  And be sure it never looks like it’ll boil over.  Burnt sugar on your burner would ruin Christmas, or whatever other silly things you people celebrate.  Remove your pan from the burner promptly at 240F and pour the whole mess straight on top of the gelatin.  
Now with that fancy mixer, or a nice little hand-held version, whip that shit!  But don’t fling hot sugar on your eyeballs.  You’re looking for about a triple in volume, and it’ll be silky-looking and white and fluffy.  Should take 10-15 minutes-ish.
While you’re overseeing that, have a tiny helper or small slave whip the egg whites in a separate bowl until you get peaks.  These peaks can be loose or stiff or somewhere in between; don't really think it makes a huge diff.
Beat your whites into your sugar fluff, followed by the coconut flavoring.
Coax it all into the prepared pan.  Very sticky.  Sprinkle the remaining toasted coconut on top.  Let it chill, uncovered, until firm, for at least 3 hours, or up to a day.
Now time to cut!  So fun!  Pry the marshmallow block away from the sides of the pan to loosen and then grab an end and pull the whole thing outta there, right onto a cutting board, the bigger the better.  Cut into whatever sizes you want.  A lightly oiled pizza wheel works good for this.  Toss your fluff buds in the remaining powdered sugar, shake off excess, and cram that face.  Cram your friends’ faces too.


TASTING NOTES
FLLLLLUFFY!!!!  So tender as well.  Those little crunchy coconut bits break up the wondrous monotony of heavenly cloud cubes.  You can squish'em, bounce'em, or even put'em on yer titties like pasties (because they're sticky inside)!!!


Friday, December 17, 2010

Scotch Eggs? Okay.

Exhibit A.  the scotch egg.
Throughout the UK, one can commonly find run-of-the-mill Scotch Eggs cling-filmed in supermarkets, convenience stores, and motorway service stations: a hard-boiled egg surrounded by sausage, rolled in bread crumbs, and deep-fried.  Then slapped in the cool box for a couple months, until those limey blokes waddle along and decide to start muggin’ up.  Bluuuurgh.
  Variations also abound.  A plethora of supermarket brands over there across the pond feature a chopped egg center combined with mayo or bacon.  In Manchester they use a pickled egg and throw in some black pudding, which is some seriously ridiculous pudding (look it up).  Some US “pubs” dip them in ranch.  In case you didn’t know, you can ruin a TURD by dipping it in ranch.  The occasional state fair might serve them on a stick, which is handy and extra fun.  This silly snack nugget has even found it’s way to multiple fast-food chains in Africa.  Yep, Africa has fast-food chains.  
  Well, despite all that could go wrong with such a concoction, we found this classic British picnic fare to have some major potential.  MAJOR.

I beleive the conversation went something like this....

Ritter: Balls?!
Amanda: BALLS!!
Mike B: Balls.
Aiko: ruff!

Fried sausage-y balls?!?! A resounding Yes please!!! 
...But hold the coagulated blood, thanks.
  
We went for a relatively simple equation:
INGREDIENTS
6 hard-boiled eggs, peeled (blanching in cold water after boiling eases the peeling! And it will smell like dog farts in your kitchen for an hour or so)
3/4-1 lb sweet Italian sausage (yeah! pork fat!), or your preferred ground meat mixture
3/4 cup dry bread crumbs, seasoned as you like
heavy saucepan with about 3 inches of peanut or canola oil for frying
 (but we plopped them in the Fry Daddy; love that thing)
some sauces you like, for dipping
METHOD
  Heat your oil on the cooker to about 360 degrees, give or take a few.  If you don’t have a frying thermometer, drop a 1” cube of bread in there, and if it browns nicely in about a minute, you’ve got yourself about 365.  Don’t be afraid to estimate a little.  The shit will still get fried.  A little hotter is better than a little too cool.  But if you’re lucky like some of us, you can have both.
sausage baby
  Divide the sausage into 6 portions.  Take each glob and flatten it like a burger, about 1/4-3/8 inch thick.  Just slap it out into a niiice thin round of meat. Not too thick now, y’hear??? Too much sausage means the outer breading will burn and you'll still have raw pork fat.        
  
Now wrap it around those little bollocks.  Roll them in the bread crumbs, good ‘n crumby.  Really pack those crumbs on there.  It’s imperative for a deliciously crispy coating!
  
cradle and crumb-coat
Fry 2 eggs at a time, but no more, for about 1 1/2-2 minutes.  Keep an eye on the outside.  It should brown up pretty quick.  If you do more simultaneously, the oil temp could drop too drastically and you could have greasy-sponge no-good crap balls instead of nice crispy buddies.  Don’t waste yer pork fat! 
  Drain and serve halved or quartered alongside you favorite saucy bits.  But no ranch allowed, wally.
  
TASTING NOTES
HP=A1, more or less
What do you think it tasted like???  Deep-fried sausage-covered eggs.  And with the pairing of HP sauce and some decent brown mustard, we hit this one basically way out of the park.  If you're unfamiliar with HP, it's fancy British A1.  Thanks, the UK.  


We reveled in a miniature pig-out session spent hovering over the greasy countertop just praying for a reason to stop wolfing them down.  But honestly, one is enough.  Oh, gut rot.  Oooooh bloat.